No edit summary |
mNo edit summary Tag: Visual edit |
||
| Line 199: | Line 199: | ||
* OFF: B + T '''(you can now move while charging SRTE, also uses moving pose glitch concept) '''''Medium'' |
* OFF: B + T '''(you can now move while charging SRTE, also uses moving pose glitch concept) '''''Medium'' |
||
* STAND OFF : SPACE+E+LMB+R+F+SPACE+E+B+STAND ON+E (about 170-200 damage) |
* STAND OFF : SPACE+E+LMB+R+F+SPACE+E+B+STAND ON+E (about 170-200 damage) |
||
| − | * B + R + T (close together so you know it's movement glitch) F + V + Y + Z + R + Z + E + R '<nowiki/>''Very Hard'<nowiki/>''''' '''(this can Instant Kill a |
+ | * B + R + T (close together so you know it's movement glitch) F + V + Y + Z + R + Z + E + R '<nowiki/>''Very Hard'<nowiki/>''''' '''(this can Instant Kill a Kars) |
*STAND OFF SPACE+E+F+T(No hold) '''Easy''' |
*STAND OFF SPACE+E+F+T(No hold) '''Easy''' |
||
*STAND OFF SPACE+E+B+Q+F STAND ON F+R |
*STAND OFF SPACE+E+B+Q+F STAND ON F+R |
||
| Line 248: | Line 248: | ||
* Z STAND ON + F + Z STAND OFF + Q + F + F + E (Aerial) '''Very Hard''' |
* Z STAND ON + F + Z STAND OFF + Q + F + F + E (Aerial) '''Very Hard''' |
||
* STAND OFF R + Z STAND ON + R + Z + E + Z + E + Z STAND OFF + T/Q '''Very Hard''' |
* STAND OFF R + Z STAND ON + R + Z + E + Z + E + Z STAND OFF + T/Q '''Very Hard''' |
||
| − | * '''STAND OFF ''' Space+V '''STAND ON '''E/R '''Hard''' |
+ | * '''STAND OFF ''' Space + V '''STAND ON '''E/R '''Hard''' |
* '''STAND OFF ''' R+LMB '''STAND ON''' R '''Medium''' |
* '''STAND OFF ''' R+LMB '''STAND ON''' R '''Medium''' |
||
* '''STAND OFF ''' F + '''STAND OFF ''' T '''Easy''' |
* '''STAND OFF ''' F + '''STAND OFF ''' T '''Easy''' |
||
| Line 256: | Line 256: | ||
* '''STAND OFF '''+ R + C + LMB + E + '''Stand On '''+ V + E '''Hard''' |
* '''STAND OFF '''+ R + C + LMB + E + '''Stand On '''+ V + E '''Hard''' |
||
* STAND OFF + F + Stand On + E '''Easy''' |
* STAND OFF + F + Stand On + E '''Easy''' |
||
| − | * Stand On + F + STAND OFF (Z) + Q + Y + Stand On (Z) + E + R + STAND OFF (Z) + T ( |
+ | * Stand On + F + STAND OFF (Z) + Q + Y + Stand On (Z) + E + R + STAND OFF (Z) + T (Uncharged) '''Hard/Medium ''' |
| − | * Stand On + F + Z + B + Y |
+ | * Stand On + F + Z + B + Y '''Easy/Kind of Complicated''' |
* '''STAND ON''' F + '''STAND OFF ''' Q + '''STAND OFF '''F + '''(STAND OFF '''T''' Uncharged''') '''Medium/Hard''' |
* '''STAND ON''' F + '''STAND OFF ''' Q + '''STAND OFF '''F + '''(STAND OFF '''T''' Uncharged''') '''Medium/Hard''' |
||
* STAND OFF + Click + R + Air kick (e on air) + F + Q'' '''''Medium''' |
* STAND OFF + Click + R + Air kick (e on air) + F + Q'' '''''Medium''' |
||
| Line 268: | Line 268: | ||
* STAND OFF Jump + V + E (you can use shift lock to change direction when you aerial punch after dashing. Great for catching up to opponents. Don't overshoot the aerial punch.) |
* STAND OFF Jump + V + E (you can use shift lock to change direction when you aerial punch after dashing. Great for catching up to opponents. Don't overshoot the aerial punch.) |
||
* STAND OFF B + ZE + ZF + T (Uncharged) + F (Hard) (Great for when you're fighting stands with a lot of durabilities if you can do it all in time). |
* STAND OFF B + ZE + ZF + T (Uncharged) + F (Hard) (Great for when you're fighting stands with a lot of durabilities if you can do it all in time). |
||
| − | * STAND OFF E(Aerial)+ESTAND ON +V(To them)+RSTAND ON +RSTAND OFF *Note: |
+ | * STAND OFF E(Aerial)+ESTAND ON +V(To them)+RSTAND ON +RSTAND OFF *Note: R STAND OFF must be activated while RSTAND ON is activating. '''Hard/Medium''' |
* STAND OFF F+ESTAND ON . '''Easy''' |
* STAND OFF F+ESTAND ON . '''Easy''' |
||
* STAND OFF Jump+V+E(Hit them)+C+VSTAND ON +E+QSTAND OFF . Great for catching and treating them like a ping pong ball. |
* STAND OFF Jump+V+E(Hit them)+C+VSTAND ON +E+QSTAND OFF . Great for catching and treating them like a ping pong ball. |
||
| Line 324: | Line 324: | ||
* '''STAND ON : '''F + Z (As fast as possible) + Q + Wait for TS End + Z + R + Z + Q'''''<nowiki/>''''' '''(Medium)''' |
* '''STAND ON : '''F + Z (As fast as possible) + Q + Wait for TS End + Z + R + Z + Q'''''<nowiki/>''''' '''(Medium)''' |
||
* '''STAND ON : '''F + Z + Q + Z + E + R + H '''(Pretty Hard)''' |
* '''STAND ON : '''F + Z + Q + Z + E + R + H '''(Pretty Hard)''' |
||
| − | * '''STAND ON : '''F + Z + T + Q '''(Easy) '''(Can insta |
+ | * '''STAND ON : '''F + Z + T + Q '''(Easy) '''(Can insta-kill low dura stands) |
* '''STAND OFF : '''SPACE + E + LMB + Z + E + R + F + Z + T (Just tap "T" don't hold it) + Q + B + F (F is optional you can use instead SPACE + V or SPACE + E) + R + LMB + Y + Z + E '''(Medium)''' |
* '''STAND OFF : '''SPACE + E + LMB + Z + E + R + F + Z + T (Just tap "T" don't hold it) + Q + B + F (F is optional you can use instead SPACE + V or SPACE + E) + R + LMB + Y + Z + E '''(Medium)''' |
||
* STAND OFF ''': '''B + Y (Spam Y when you land your B) + V (Use V and dash towards opponent) + F ('''Hard)''' |
* STAND OFF ''': '''B + Y (Spam Y when you land your B) + V (Use V and dash towards opponent) + F ('''Hard)''' |
||
| − | * '''STAND OFF :''' LMB + B + V + Y + Z + E + R '''(Hard)''' (Can insta |
+ | * '''STAND OFF :''' LMB + B + V + Y + Z + E + R '''(Hard)''' (Can insta-kill a lot of low dura stands) |
* '''STAND OFF : '''R + Z + E + Z + SPACE + E + B + T + SPACE + E + Z + R + E + Z + SPACE + E + B + Z + F + Z + T + Q + R + Z + E + Z + SPACE + E + B + F + Z + R + E '''(Medium/Hard) '''(In the '''"Blood Drain Grab" '''parts, you can use a bug, is the move while posing concept, but instead of P is T or F) |
* '''STAND OFF : '''R + Z + E + Z + SPACE + E + B + T + SPACE + E + Z + R + E + Z + SPACE + E + B + Z + F + Z + T + Q + R + Z + E + Z + SPACE + E + B + F + Z + R + E '''(Medium/Hard) '''(In the '''"Blood Drain Grab" '''parts, you can use a bug, is the move while posing concept, but instead of P is T or F) |
||
* '''STAND OFF: '''Space + E + Z +E (quick) + Z + Q + T + Space + V (to enemy)+ E (Aerial E) + R + Z + R + E (quick) + Q '''(Medium)''' |
* '''STAND OFF: '''Space + E + Z +E (quick) + Z + Q + T + Space + V (to enemy)+ E (Aerial E) + R + Z + R + E (quick) + Q '''(Medium)''' |
||
| Line 366: | Line 366: | ||
== Trivia == |
== Trivia == |
||
| − | * '''''Voicelines:''''' Shadow The World's voice lines are: '''"...You are'' watching me?!"''''' and, "'''''You are next.", '''''which are lines taken directly from Shadow |
+ | * '''''Voicelines:''''' Shadow The World's voice lines are: '''"...You are'' watching me?!"''''' and, "'''''You are next.", '''''which are lines taken directly from Shadow DIO in HFTF. |
| − | * When the user dies, it will yell: '''''"GYAAAGH...GYAAAGH...GYAAAGH...GYAAAGH...", '''''as a death sound, which is the death sound of Shadow |
+ | * When the user dies, it will yell: '''''"GYAAAGH...GYAAAGH...GYAAAGH...GYAAAGH...", '''''as a death sound, which is the death sound of Shadow DIO in HFTF as well. |
| − | * In the past when performing the menacing pose, the user will start to play [https://www.youtube.com/watch?v=reH8BmACS9k Shadow Dio's Theme Remastered ] , a remastered version of Shadow |
+ | * In the past when performing the menacing pose, the user will start to play [https://www.youtube.com/watch?v=reH8BmACS9k Shadow Dio's Theme Remastered ] , a remastered version of Shadow DIO's Theme from [https://jojoban.fandom.com/f '''JoJo's Bizarre Adventure: Heritage For The Future''']'''.''' |
* When posing, the user will gain a star-shaped particle effect on their shoulder, representing the Joestar birthmark, referencing DIO stealing Jonathan's body. DIO's pose in the picture from Part 3 of the Anime: '''[https://jojo.fandom.com/wiki/Stardust_Crusaders Stardust Crusaders]''' also shows the birthmark. |
* When posing, the user will gain a star-shaped particle effect on their shoulder, representing the Joestar birthmark, referencing DIO stealing Jonathan's body. DIO's pose in the picture from Part 3 of the Anime: '''[https://jojo.fandom.com/wiki/Stardust_Crusaders Stardust Crusaders]''' also shows the birthmark. |
||
| Line 377: | Line 377: | ||
* STW also has pain grunts for being hit. This is also the first stand to introduce pain grunts without being killed first. Due to a few updates, this has been changed to ragdolling instead of being hit/hurt, so basically, when you get hit, you don't grunt. However, when you get ragdolled you grunt. |
* STW also has pain grunts for being hit. This is also the first stand to introduce pain grunts without being killed first. Due to a few updates, this has been changed to ragdolling instead of being hit/hurt, so basically, when you get hit, you don't grunt. However, when you get ragdolled you grunt. |
||
* The Shadow Combo has the name, "World 21" in [https://jojo.fandom.com/wiki/JoJo's_Bizarre_Adventure%3A_Heritage_for_the_Future Heritage for the Future] (which is also a reference to the tarot cards from the anime), due to it also punching 3 times, and also getting a bit more range with every hit (or punch actually). |
* The Shadow Combo has the name, "World 21" in [https://jojo.fandom.com/wiki/JoJo's_Bizarre_Adventure%3A_Heritage_for_the_Future Heritage for the Future] (which is also a reference to the tarot cards from the anime), due to it also punching 3 times, and also getting a bit more range with every hit (or punch actually). |
||
| − | * Shadow The World's Voicelines are Distorted versions of |
+ | * Shadow The World's Voicelines are Distorted versions of DIO's voice because in Heritage for the Future, Shadow DIO had a distorted voice as well because that would add a said, "Mystery" Effect. (This worked great back in the day, but by today's standards, this sounds really janky and funny.) |
* Like many other stands, Shadow The World is often shortened to STW because of how long the actual stand name is. |
* Like many other stands, Shadow The World is often shortened to STW because of how long the actual stand name is. |
||
* It’s fighting style is similar to that of HFTF, where you must create a combo to do great damage. |
* It’s fighting style is similar to that of HFTF, where you must create a combo to do great damage. |
||
| Line 384: | Line 384: | ||
* When the '''"AYRTTSM"''' Counter works, Shadow The World will say, ''"Omae No Hoshii Mono Wa, Nanda?''" which means, “What Is It That You Desire?" The ability itself is a reference to when Hol Horse tries to shoot DIO in the head, but DIO stops time and goes behind him. However, the voice line and the idea of DIO holding a book and a glass of wine are from the JoJo game Heritage For the Future. |
* When the '''"AYRTTSM"''' Counter works, Shadow The World will say, ''"Omae No Hoshii Mono Wa, Nanda?''" which means, “What Is It That You Desire?" The ability itself is a reference to when Hol Horse tries to shoot DIO in the head, but DIO stops time and goes behind him. However, the voice line and the idea of DIO holding a book and a glass of wine are from the JoJo game Heritage For the Future. |
||
* The book that DIO hold's when using H is a [https://a-bizarre-day-roblox.fandom.com/wiki/DIO%27s_Diary DIO's Diary] from part 6. |
* The book that DIO hold's when using H is a [https://a-bizarre-day-roblox.fandom.com/wiki/DIO%27s_Diary DIO's Diary] from part 6. |
||
| − | * When the user does |
+ | * When the user does Blood suck (Stand-Off B move) the user will say "Jitsuni Nazimuzou!", Which means "It really suits me!", which means that the fresh blood of the opponent really suits the user. |
* STW now has a time-stop animation, it takes 3 seconds to begin a time stop, so trying to defeat someone without them expecting it is difficult. The animation is longer than the actual time stop. |
* STW now has a time-stop animation, it takes 3 seconds to begin a time stop, so trying to defeat someone without them expecting it is difficult. The animation is longer than the actual time stop. |
||
* STW used to actually be a Shiny for Vampiric The World upon release, the name being 'The World (Shadow)'. This version of VTW had a gray and black body. It's Barrage and Strong Punch had the echo effect for the voices. Eventually, this version of STW was very quickly changed into the very first unique version of STW, having nearly all its moves completely changed with the exception of its F move which was a side-grade to most time stops. |
* STW used to actually be a Shiny for Vampiric The World upon release, the name being 'The World (Shadow)'. This version of VTW had a gray and black body. It's Barrage and Strong Punch had the echo effect for the voices. Eventually, this version of STW was very quickly changed into the very first unique version of STW, having nearly all its moves completely changed with the exception of its F move which was a side-grade to most time stops. |
||
Revision as of 17:38, 10 October 2020
"You are watching me, aren't you?!" - DIO, Heritage for the Future (DIO, ディオ.)
Summary
Shadow The World, often shortened and commonly referred to as STW, is the non-canonical Stand used by Shadow DIO, a playable secret character featured in the game JoJo's Bizarre Adventure: Heritage For The Future.
Although this Stand does not have great durability, it can do a lot of damage if utilized correctly and if the combos are executed correctly.
This Stand is obtainable through using a Camera on Vampiric The World. Shadow The World can also be obtained with the Bizarre Arrow with a random chance of getting it.
Appearance
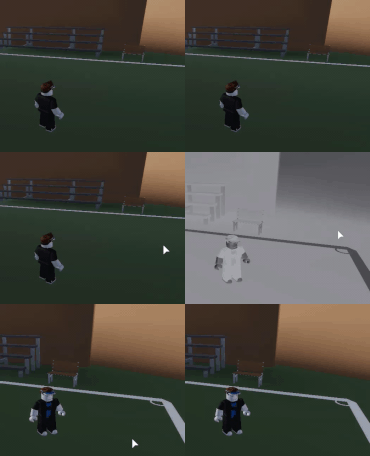
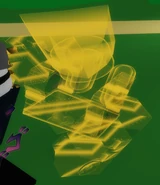
Shadow The World has a golden, almost yellowish outline, and a humanoid build. However, there is only half of Shadow The World's actual body for its model.
Its appearance is based on the silhouette of The World; however, instead of being black and opaque, like shadows generally are, it is transparent and has a golden outline. It wears a headpiece covering its face to below the place of its nose, slanting at a steep angle from the base of its forehead to a peak situated above the rear of its head by about half its height, leaving the face of an inverted triangle visible to the front; somewhat similar to the Red Crown Of Egypt.
Much of its lower body has faded away/has the effect of fading away, like a hologram, similar to that in Heritage For The Future. This Stand has also gone through many color changes. Starting with Yellow, to Black, then to the bright colors, and again to yellow, the one we have now, a reintroduction of the old model.
Movesets/Abilities
| Key | Name | Description | Damage | Cooldown |
|---|---|---|---|---|
| The player jabs the opponent at an extremely fast rate only dealing pitiful damage. On the bright side, the attack stuns slightly and slows the opponent down. This is good for making sure your opponent doesn't escape your combos. The animation for this attack is a reference to DIO/Shadow DIO's low jab from Heritage for the Future. | ||||
| The user quickly throws two pairs of knives that do 12.5 damage each with a cooldown of around 5 seconds. This move is pretty good if you want to chip away an opponent's health. Try using this when your enemy is far away.
Note: you cannot move while using this ability. |
||||
| With the aid of Shadow The World, the user throws 8 knives each doing 10 damage in the direction they're facing, dealing a good amount of damage if all knives hit. Keep in mind that Stand Mode must be on to time stop and off to use this move. You cannot use this in another player's time stop. | ||||
| From out of nowhere, the player does a very fast punch that deals moderate damage and knocks the enemy backward a good distance. Unlike Heritage, this can hit grounded people. While being with Stand mode and switching to False, the user will have 1 second cooldown for this move. | ||||
| While in air, the player quickly dashes forwards, punching the first enemy that they come in contact with while at the same time knocking them back and dealing moderate damage. This is one of the most important moves in Shadow The World's gameplan, as you can combo it with almost every other move, such as F. | ||||
| The user grunts and kicks the enemy doing knockback into the air (which can allow air combos). If used right, this can turn into a time stop combo. | ||||
| The player covers their eyes for a few seconds, channeling pressurized fluid into their eyes. Soon after, they bend back and fire two fast laser-like projectiles from their eyes which pierce the opponent and deal great damage. However, if the move is charged, they will instead fire two red laser-like projectiles that deal superior damage on contact. (Using this during time stop will trick the game into thinking the laser is constantly touching the player and will multiply damage over time dealing lethal damage) |
|
|||
| The player tilts back and then performs a powerful arching swing forwards, dealing incredible damage. This move can be canceled when someone hits you while you are looking up. but you still block the damage. Therefore you won't get ragdolled. | ||||
| The player pushes themselves off the ground, traveling a good distance forwards. This dash is similar to Kars and Vampire's dash move. | ||||
| The user lays down and releases a white ball of light, stunning and damaging everybody near its area of effect. The user screams Dio's infamous warcry WRYYYYY while doing it as well.
Note: The bubble may be small, but the hitbox can be bigger. Also can bypass counters such as AYRTTSM? Epitaph And Prime Number Counting. |
||||
| Plunge your arm into your foe and take their blood (while doing a pose) for your own while also dealing and healing a great amount, specifically healing 30 damage. Then you will throw the opponent. During this, you will yell "Jitsuni Nazimuzo!(It really suits me!)” This move is also shared with vampires and Vampiric The World, and similar to Kars' healing ability as well. You cannot move during this bloodsuck when it successfully hits, unlike other bloodsucks. This move can cancel barrages. |
| Key | Name | Description | Damage | Cooldown |
|---|---|---|---|---|
| Stand mode can be enabled/disabled by pressing either Z or Left Ctrl. By toggling stand mode on and off, the user can switch between the stand's different movesets. The moves listed below can only be used while stand mode is active. The moves above can't be used while Stand mode is active. Blocking is only usable while Stand mode is active and you can't roll while Stand mode is active. | ||||
| Shadow the World will manifest and it will punch the enemy doing light damage. This move has low cooldown, making it spammable. | ||||
| Shadow The World will temporarily manifest and will do a shadowy uppercut that deals great damage and stuns the opponent. (İf you are close to the enemy you have a chance to punch 2 times) This could've been inspired by the stomach punch from JoJo's Bizarre Adventure: Heritage For The Future. With V, this can allow surprise attacks. | ||||
| Shadow The World temporarily manifests once more and will punch the target three times, each punch dealing great damage with great speed by time stopping between the punches, making it goes faster. It will have a similar attack to The World: Alternate World's E move, but weaker, with less damage, and no knockback. | ||||
| Stops time for 2 seconds, but in return, the move will have a lower cooldown of about 25 seconds. The user can also throw multiple knives using Q while in stopped time (Stand mode must be toggled off). However, unlike other time stops, this one occurs almost instantly, with a small animation beforehand and with the OVA Quote. | ||||
| This skill is a countermove, Once pressed, you will immediately start reading a book (Possibly the model of Dio's Diary) And in your other hand, you will holster a glass of wine. If you are touched while this skill is in effect, you will stop time and you will teleport behind their back. You can hit them when you teleport and you can also move. Rarely, this ability can bug slightly and the ragdoll effect of an attack can still affect you. You can also attack while this active with E or R like the Shadow Block Glitch.
Note: This does not work on projectiles like knives or gunshots, Gold Experience Requiem and Samurai Petal Clave. It doesn’t work on Over Heaven overwrite. However, SPSO's spear throw is countered, strangely. |
||||
| Teleport to where your cursor it has a range of around 50 studs. You can use this to dodge the Road Roller explosion. This move can allow for sudden attacks and different combos for this stand. With the new map, this ability can also help the user instantly teleport to the roof of a building. Do note that after using this, Shadow Uppercut will be given an extra second of cooldown. |
Battle Strategies
General Combat Knowledge:
Shadow The World is known for having many moves which when many of them combined, can make great combos. STW is a rare stand, along with TA4 and many others. After being nerfed, STW is losing value. STW is still a very powerful stand for 1v1s and tournaments. Since STW has many moves, there are many combos you can make by yourself. STW's block isn't as effective as other stands, but it is useful when you are being barraged or when you can't dodge an attack. Shadow The World has a counter move (Stand Mode On: H) that can be used in 1v1s (note that OHs' T move and GERs can bypass it). STW used to have a very low durability, but it has received a health buff along with all other stands, as a way to make up for removing the regeneration passive. Using B can cancel barrages, so this is helpful against TA4s and GERs.
Technicalities:
Teleport is very useful, It may have short range but you can use it to escape from the opponent. However, since an update, STW received a balance and is unable to attack instantaneously when teleporting. It may not seem like much. One way to avoid the "time stop stun" is to use a move before you teleport (eg. Shadow Uppercut) which allows you to exploit the hitbox of a move so that when you teleport, the hitbox follows you, thus allowing you to hit the opponent. When you do this the "time stop stun" will be broken allowing you to do a move even though you already teleported.
You cannot move during your Q or T. So try to use them from far distances. The Q and T move won't damage the opponent if he is 1 stud or nearer from you. You can steal other people's time stops. This is not likely an intended feature. It can be performed by time-stopping before someone else begins their windup to stop time. This only works because of ping. It's hard to explain, but this is the best way to put it; the game has a mechanic where nobody can stop time after someone else has stopped time for a short period. This period immediately starts when a time stop windup begins. Once someone's time stop is stolen, they cannot move in it and you can spam all your knives, lasers, etc. Every time stop can be stolen except another Shadow The World's. This is a glitch similar to the old one, before Global Time Stop Cooldown was added.
Match-Ups:
The World (Over Heaven):
You have the advantage here, since TW:OH is almost the exact same as SP:OH. TW:OH has lots of health due to its durability being S making it very tanky, use your projectiles to zone out the TW:OH and try to avoid going into close range combat the only thing you should watch out for is TW:OH knives as they do a lot of damage especially if the enemy is at low hp. Also watch out for TW:OH H move since it is movable.
Star Platinum (Over Heaven):
You have a huge advantage here, your speed will completely outclass SP:OH. However, SP:OH is tanky and also a heavy hitter, so try and not to engage in close combat too much. Chip Damage is HIGHLY recommended, so SRSE (Space Ripper Stingy Eyes) and Double Knife Volley are very good here. If you TS and then use knives (better for dealing with an RKing SP:OH), you can take a lot of his health.
Kars:
Very even match up, Kars wins at the health and damage department, while you win at the movement and range department. Kars is a very close ranged spec with only 1 projectile that is very hard to hit, try and zone the Kars out with projectiles and try to not get too close as they will shred you with their barrage. Because Kars only has one projectile move, they usually falls in Shadow The World's counter move. Again, try not to engage in close quarters/combat too much.
Samurai:
Pretty much the same as Kars, However Samurai does have the advantage of being slightly faster than you. Most Samurais run and hit Players so when a Samurai gets too close try to use the F move STAND OFF which allows you to ragdoll the Samurai and use combos. When the samurai is running, try to gain distance and use your ranged moves, however, this can be punished because Samurai has One ranged move very similar to Kars' ranged move. When the Samurai does the dash move (F move for Samurai) try to Dodge (C key) or dash (V key) in order to dodge it. Try to use the dash/teleport and Counters frequently and also try to hide in obstacles in order to cut sight from the Samurai seeing your time stop pose.
Star Platinum (Stone Ocean):
Regardless, we need to give this stand a notice against STW. This stand does not have that much range or power but can counter STW if used properly. The T move is countered, so you have to start running. With enough skill it IS possible to defeat STW.
Basic Hamon:
Due to STW having an allergy to Hamon, you can easily punish them if you land their moves, you are out-matched by movement though. You can be punished very easily if you can't land your moves or have bad timing. Do not use Hamon's barrage, STW can easily escape your barrage, you are also slow when you barrage, letting the STW to counter you. Try to land your sword as much as possible, because the vampiric passive "Undead Prey" and "Hamon Allergy" can take away 50-80% of STW's health if the sword hits. If used correctly, you can defeat a STW very quickly.
Joseph Hamon:
As a STW, Joseph Hamon pretty much counters you in every single way. It is able to damage you from range, mess up combos, and can slightly out-speed you. Not only that, it can do extra damage due to you having a Hamon allergy. If you're at a range, do not attempt to stand still. The JH user will likely attempt to use either the Thompson or Clacker Volleys. If they attempt to use the Thompson, try to move in close so that you can get a combo in, as they cannot move while using it. If you're close to them, watch out for their Stomach Punch and Rope Trick, as these will easily screw you over. Lastly, try to use combos that knock down the opponent a lot, as they can easily use the Hermit Purple Block if they get back up. If they do try to use the Hermit Purple Block, use either Double Knife Volley or Space Ripper Stingy Eyes, as all projectiles bypass through the Hermit Purple.
Combos:
- STAND OFF : B + R + Z + E (or R) + Q Medium
- STAND OFF : Q + F + E Easy
- STAND OFF : R + space + E (medium)
- STAND OFF : B + R (really fast) + Space + E + Z + E + Z + Q (Medium)
- STAND OFF : space + E + Z + E + Z + V + Z + V + R + Z + B + R + F + Z (You will be able to move while preparing for time stop because of the glitch only if you land B though) + F + Z + Q + T. Hard
- IF OPPONENT SAYS NO TS: STAND OFF : space + E + Z + E + Z + V + Z + V + R + Z + B + R + F (You will still be able to move while preparing to use Y because of glitch only if you land B though) + Y + Q.
- OFF: B + Y + V (you can move during y, uses the concept of the moving pose glitch) Easy
- STAND OFF : Click + E + R + F (Easy)
- OFF: B + T (you can now move while charging SRTE, also uses moving pose glitch concept) Medium
- STAND OFF : SPACE+E+LMB+R+F+SPACE+E+B+STAND ON+E (about 170-200 damage)
- B + R + T (close together so you know it's movement glitch) F + V + Y + Z + R + Z + E + R 'Very Hard' (this can Instant Kill a Kars)
- STAND OFF SPACE+E+F+T(No hold) Easy
- STAND OFF SPACE+E+B+Q+F STAND ON F+R
- STAND ON F+Z+T (Don't hold)+Q+Z+(E Optional Use it for stands with A in durability or higher.) When you use the time stop press t right away as it makes it faster also press E when you are doing the knife animation as it is not possible to do the E after the animation
- STAND ON/OFF B+Z+R+E+F+Z+T+Q Hard (Instant kill) (EDIT: Time stop is no longer instant, so try doing it without the time stop, you can continue using it if you want max damage though)
- STAND ON H+R+E+Z+Q+Y+T (No Hold)+B (If Needed) Medium/Hard
- STAND ON F+Z+E+R+B+F+Q Medium/Hard
- STAND ON F+Z+T+Q
- STAND OFF R+Z+V+E+Z+JUMP+E
- STAND ON F+Z+Q+F Easy
- STAND ON F + Z + Q + B + Z + E Medium
- STAND OFF LMB + E + STAND MODE ON E + V + R + STAND OFF LMB + F + Q + SPACE + E + STAND MODE ON E (Intermediate)
- STAND OFF B + spam R + C + space + E + Z + F + Z + T (uncharged) + Q. (Overkill) Medium/Hard
- STAND ON F + STANDOFF SPAM Q
- STAND ON V+E+Z+Q+T+SPACE+E+Q+T+Z+V+E+Z+SPACE+E+Z+V+Y+Z+E+Z+Q+T Very Hard
- STAND ON F + R STANDOFF T + Q (One-shots almost every stand and must be done fast) Hard
- STAND OFF B STAND ON E + V (If far away) R
- STAND OFF E STAND ON E Easy
- STANDOFF F STAND ON V + E
- STAND OFF Z + R + E + STAND ON Z + F + Z + Q Medium
- STAND OFF Space + V + E STAND ON Z + E (Medium surprise attack move) Hard
- STAND OFF Space + E + STAND ON Z + E (this mean surprise attack move) Medium/Hard
- STAND ON + F + STAND OFF + Q + R Basic
- STAND ON E + V (teleport to enemy) + Z + B + Z + R + Z + E + Q Hard
- (Stand on start) F + Z + Q + Z + R + E Medium/Hard
- LMB + LMB + E Easy
- STAND OFF : F + Z + E (should attack as you lean back) + F + Z + Q Very Hard
- R + Space + E + B Easy
- B + T + Q (You have to time this correctly for maximum damage) (Not always consistent) Easy/Medium
- B + R + T (More consistent) Easy
- LMB + R + "space + E" Easy
- B + Q/T/F (+ Q) Easy
- STAND ON F + Z + Q + Z + F The Ender
- (OFF: F + Z) Q + Y Easy
- B + Z + E + Z + R + Space + E + Z + E/R Hard
- R + C + E Easy
- E + R + Q Easy
- (R + E) - (Can be used for both forms) Easy
- F + B + Q Easy
- B + Z + E + Z + R + T + Q (Must be timed fast, all inputs have to be done while still bloodsucking.) Hard
- F + Q + R + E (Aerial) Medium
- R + E + C + B + Q Medium
- R + E + F + Q Medium
- E + B + F + R Medium
- R + F + Q Medium
- E (in air) + Q + V (to them) + R + T Hard
- B + F + V + R + E Hard
- Z STAND ON + F + Z STAND OFF + Q + F + F + E (Aerial) Very Hard
- STAND OFF R + Z STAND ON + R + Z + E + Z + E + Z STAND OFF + T/Q Very Hard
- STAND OFF Space + V STAND ON E/R Hard
- STAND OFF R+LMB STAND ON R Medium
- STAND OFF F + STAND OFF T Easy
- STAND OFF B + R + F High / Medium Damage - Easy
- STAND ON F + Z + T + Q EASY (very powerful) here
- STAND ON E + R + STAND OFF E + R + stand on E + R + STAND OFF + F HARD
- STAND OFF + R + C + LMB + E + Stand On + V + E Hard
- STAND OFF + F + Stand On + E Easy
- Stand On + F + STAND OFF (Z) + Q + Y + Stand On (Z) + E + R + STAND OFF (Z) + T (Uncharged) Hard/Medium
- Stand On + F + Z + B + Y Easy/Kind of Complicated
- STAND ON F + STAND OFF Q + STAND OFF F + (STAND OFF T Uncharged) Medium/Hard
- STAND OFF + Click + R + Air kick (e on air) + F + Q Medium
- (STAND OFF .) R + Space + E + B + R + T (Uncharged) + Z +V (Teleport behind if he didn't leave.) + E + R + Z + F Hard
- STAND ON X + LMB Multiple Times (You can do LMB while blocking and you stay in your "blocking" state) Easy
- E + R + Q Easy
- STAND ON F + STAND OFF Q + STAND ON R + E +STAND OFF B + (Stand Mode)R Medium/Hard
- STAND ON R STAND OFF R + (Aerial) E + STAND ON E [Optional: STAND OFF Q Medium
- STAND ON F + STAND OFF T + Q OP and Easy
- STAND OFF Jump + V + E (you can use shift lock to change direction when you aerial punch after dashing. Great for catching up to opponents. Don't overshoot the aerial punch.)
- STAND OFF B + ZE + ZF + T (Uncharged) + F (Hard) (Great for when you're fighting stands with a lot of durabilities if you can do it all in time).
- STAND OFF E(Aerial)+ESTAND ON +V(To them)+RSTAND ON +RSTAND OFF *Note: R STAND OFF must be activated while RSTAND ON is activating. Hard/Medium
- STAND OFF F+ESTAND ON . Easy
- STAND OFF Jump+V+E(Hit them)+C+VSTAND ON +E+QSTAND OFF . Great for catching and treating them like a ping pong ball.
- STAND ON H+E/R. Easy and good for catching opponents off guard.
- STAND OFF B+R(while the bloodsuck animation is still in play) + Aerial E (Medium/hard, but heals you up and deals above average damage. Must time the Aerial E correctly).
- STAND ON LMB + LMB + E + F + Z STAND OFF + Q + R (finish off with a simple T or with a flashy Y.)
- STAND OFF F (intentionally miss your target) + Aerial E (Hit behind your target)+(optional) ( STAND OFF ) R
- STAND OFF B + F + Z STAND ON E + R + H + Z STAND OFF E (Aerial) + R. Hard
- STAND OFF B + F > Q + T (">" means combo cancelling, the next attack can be performed without animation delay)
- STAND OFF E^ (aerial) R + B + F + T + Q. use this to see how. here
- [STAND ON] F, [OFF] Q, F jump + E, [ON] V (to target) R (Hard)
- [STAND OFF ] B, T (hold), [ON] F, release T, [OFF] Q, [ON] E (Hard)
- STAND OFF C+Space(Quickly)+E. Easy.
- STANDOFF| SPACE+E+R+Z+E+Z+(F+Z+E | DO QUICKLY)+Z+T+Q Transcendent
- STANDON| F+E+R+Q+Y Hardcore
- STAND OFF F (Wait upon impact) + Z + E (Easy)
- STAND ON, F, STANDOFF, E + R + Q (Easy)
- STANDOFF, LMB, R, Wait for a split second, Mid-air E, STAND ON (Z), E.
- STANDOFF, F, STAND ON, E, STANDOFF E in air, R. (can be looped) Medium.
- STAND OFF E-R-T (Easy)
- STAND OFF B + Spam Y + V
- STAND OFF V + R + Q (Easy)
- STAND OFF R + Space + E + Q + F + R + Space + E + Q (Medium/Spammable)
- STAND ON F+E+R+Z+Q (Quickly) (Hard)
- STAND ON E+Z+Space+E+C+R+(optional F)+Q (Medium)
- STAND ON E+Z+Space+E+C+R+F(if landed the F then roll, then proceed to do the rest of the combo)+Space+E+Q (Hard)
- STAND OFF Space+E+V+R+F+E+V (stun lock combo)
- STAND OFF B+R+Q+T (Easy)
- STAND OFF Space + E + Z + R + E + Z + Q (Medium)
- STAND OFF Space + E + Z + E (Easy)
- STAND OFF B+Z+R+E+F+Z+Q+R (Medium)
- STAND ON F+R+ESTAND OFF F+Q+TSTAND ON V+R+E(HARD)
- STAND OFF Q+F+Z+E (Warm up) (Easy)
- STAND ON F+Z+Q+V+B+Z+R (Medium, must do quickly)
- (SM OFF)E+T+R+Q+ZV(TP to enemy)+R+E+F+ZT(Charge up a bit)(Time Stop ends)+F+Q+C/V+B+R+T (Overkill, Hard)
- STAND ON R+z+Q+z+E+z+[SPACE E]
- Stand mode on, R+Z+R+E(do r 1st so that it does dmg b4 knockback)+Z+F+Q+F+Q+R+E+T+F+Z+RZ+R+E+SPACE+E+Z+R+E+Q+F+T+SPACE+E(doesnt have to impact, just for mobility)+Y+Z+E+V+B+Z+R+E+Z+F+P+Do an epic voiceline.(cursed,overkill)
- STAND OFF Space + V + E (Easy)
- STAND OFF B+ E+R STAND ON + Y (STAND OFF , this is optional)
- STAND OFF Q+R+T(Easy)
- STAND OFF : R + F + T (This combo does 110 damage in total)
- Stand mode on + v + r + STAND OFF + r + space + e + b + Stand mode on + v + r + e + STAND OFF + f + q + Stand mode on + f + STAND OFF + q + space + e + r + b
- STAND ON F + Z + Q + Z + E + R Medium/Powerful
- STAND OFF B + (quickly turn stand on) + E + Z + T (this lets you move when firing your laser) + Y (spam it after laser) (note that you can also pair the knives up with charisma too) Medium/Hard depending on skill.
- STAND OFF LMB+ B + F (Easy) (This combo is intentionally supposed to give u some of your health back if your low on health.)
- STAND ON : V+R (wait for it to end and when it ends do) +Z+R+(aerial) E+Q+T
- STAND OFF : E + R + Q + B (use if on low health) STAND ON F + E + R STAND OFF Q + E + T + B (Medium) Not that hard good damage and should be good for STW users.
- STAND OFF : B + Y + F + LMB + R + STAND ON E + STAND OFF T (Hold optional)
- STAND OFF : R + SPACE + E + LMB + Z + E + Z + Q + F + C + B + Z + E + T + SPACE + V + E + Z + H + Z +R + SPACE + E + LMB + Z + E + F + Z + Q + T + F (H is optional)
- STAND OFF : Y+Z+E+V+B+Z+R+E+Z+F+P+Z+F+Q+F+Q+R+E+T+F+Z+RZ+R+E+SPACE+E+Z+R+E+Q+F+T+SPACE+E+SPACE+E+R+Z+E+Z+(F+Z+E | DO QUICKLY)+Z+T+Q+B + F + Z STAND ON E + R + H + Z STAND OFF E (Aerial) + R (Only a Computer can do that)
- STAND OFF : SPACE + E + F (do F quickly) Easy
- STAND OFF : B + Y + V + R + Space + E + F + Z + F + Z + T + V + Z + E + Z + Q + T (Medium)
- B + Y (Click Y fast) + LMB + Q + E STAND ON E + Z + F (Hard)
- T (Hold) + Z (Fast) (This can be used to protect you while charging) (Medium/Easy)
- STAND ON : F + Z (As fast as possible) + Q + Wait for TS End + Z + R + Z + Q (Medium)
- STAND ON : F + Z + Q + Z + E + R + H (Pretty Hard)
- STAND ON : F + Z + T + Q (Easy) (Can insta-kill low dura stands)
- STAND OFF : SPACE + E + LMB + Z + E + R + F + Z + T (Just tap "T" don't hold it) + Q + B + F (F is optional you can use instead SPACE + V or SPACE + E) + R + LMB + Y + Z + E (Medium)
- STAND OFF : B + Y (Spam Y when you land your B) + V (Use V and dash towards opponent) + F (Hard)
- STAND OFF : LMB + B + V + Y + Z + E + R (Hard) (Can insta-kill a lot of low dura stands)
- STAND OFF : R + Z + E + Z + SPACE + E + B + T + SPACE + E + Z + R + E + Z + SPACE + E + B + Z + F + Z + T + Q + R + Z + E + Z + SPACE + E + B + F + Z + R + E (Medium/Hard) (In the "Blood Drain Grab" parts, you can use a bug, is the move while posing concept, but instead of P is T or F)
- STAND OFF: Space + E + Z +E (quick) + Z + Q + T + Space + V (to enemy)+ E (Aerial E) + R + Z + R + E (quick) + Q (Medium)
- STAND OFF : B + Z + E + Z + V + Y (Medium)
- STAND OFF : B + JUMP E + F + (No hold) T (Easy/Medium)
- STAND OFF : SPACE + E + R + F + V + B + Z + E (Quickly) + Z + Q + T (Hard/Very Hard)
- STAND MODE OFF : B STAND MODE ON + E STAND MODE OFF + V + Y + T + F + E (Hard)
Pros and Cons:
Pros
- Great damage output.
- Godly combo potential.
- Great ranged attacks.
- Very good mobility.
- Unpredictable if used well.
- Low cooldowns.
- Stand and the user can work very well together.
- Aerial attacks are very useful.
- Okizeme/Ragdoll combos.
- Has a counter.
- Can stop time.
- Jumping has a very short cooldown and is almost spammable.
- The TS animation can actually give you time to switch to Stand Off.
Cons
- Shortest time stop in-game.
- Cannot move when using ranged attacks.
- Doesn't have a stand jump to avoid time stops.
- Not good for farming.
- Landing longer combos take a high amount of skill.
- You can sometimes still be hit right after using your counter (H).
- "AYRTTSM" can be easily countered by projectiles.
- Mediocre block move.
- Vampiric Rush, "Charisma!" and Time Stop (The World's Unknown Ability) all have a slow startup animation, which leaves you vulnerable.
- Vampiric rush can be cancelled
- Very high skill ceiling, and skill floor; isn't beginner friendly in the slightest.
Trivia
- Voicelines: Shadow The World's voice lines are: "...You are watching me?!" and, "You are next.", which are lines taken directly from Shadow DIO in HFTF.
- When the user dies, it will yell: "GYAAAGH...GYAAAGH...GYAAAGH...GYAAAGH...", as a death sound, which is the death sound of Shadow DIO in HFTF as well.
- In the past when performing the menacing pose, the user will start to play Shadow Dio's Theme Remastered , a remastered version of Shadow DIO's Theme from JoJo's Bizarre Adventure: Heritage For The Future.
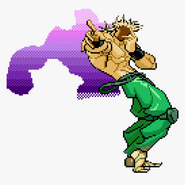
- When posing, the user will gain a star-shaped particle effect on their shoulder, representing the Joestar birthmark, referencing DIO stealing Jonathan's body. DIO's pose in the picture from Part 3 of the Anime: Stardust Crusaders also shows the birthmark.
- While posing, the user sits on a chair. In the back of this chair, there used to be something written on it, which was the following sentence; "this isn't a free model I swear". It was eventually removed.
- This stand is passive, meaning you don’t bring it out with Q like other stands.
- The Camera upgrade is a reference to Hermit Purple "watching", Dio through a camera and a TV. Another reference was that Hermit Purple could only be activated when a camera is destroyed. This can be seen in the anime and the manga.
- It is revealed that in JoJo's Bizarre Adventure: Diamond Is Unbreakable, DIO obtained this stand from being pierced with Enya the Hag’s bow and arrow.
- STW also has pain grunts for being hit. This is also the first stand to introduce pain grunts without being killed first. Due to a few updates, this has been changed to ragdolling instead of being hit/hurt, so basically, when you get hit, you don't grunt. However, when you get ragdolled you grunt.
- The Shadow Combo has the name, "World 21" in Heritage for the Future (which is also a reference to the tarot cards from the anime), due to it also punching 3 times, and also getting a bit more range with every hit (or punch actually).
- Shadow The World's Voicelines are Distorted versions of DIO's voice because in Heritage for the Future, Shadow DIO had a distorted voice as well because that would add a said, "Mystery" Effect. (This worked great back in the day, but by today's standards, this sounds really janky and funny.)
- Like many other stands, Shadow The World is often shortened to STW because of how long the actual stand name is.
- It’s fighting style is similar to that of HFTF, where you must create a combo to do great damage.
- In HFTF, the Y move (Charisma) will have vampiric spores coming out of DIO's hair. However, in-game, this is not the case, as it's a white bubble with a few particle effects.
- It has the shortest Time Stop duration of around 2 seconds and low cooldown.
- When the "AYRTTSM" Counter works, Shadow The World will say, "Omae No Hoshii Mono Wa, Nanda?" which means, “What Is It That You Desire?" The ability itself is a reference to when Hol Horse tries to shoot DIO in the head, but DIO stops time and goes behind him. However, the voice line and the idea of DIO holding a book and a glass of wine are from the JoJo game Heritage For the Future.
- The book that DIO hold's when using H is a DIO's Diary from part 6.
- When the user does Blood suck (Stand-Off B move) the user will say "Jitsuni Nazimuzou!", Which means "It really suits me!", which means that the fresh blood of the opponent really suits the user.
- STW now has a time-stop animation, it takes 3 seconds to begin a time stop, so trying to defeat someone without them expecting it is difficult. The animation is longer than the actual time stop.
- STW used to actually be a Shiny for Vampiric The World upon release, the name being 'The World (Shadow)'. This version of VTW had a gray and black body. It's Barrage and Strong Punch had the echo effect for the voices. Eventually, this version of STW was very quickly changed into the very first unique version of STW, having nearly all its moves completely changed with the exception of its F move which was a side-grade to most time stops.
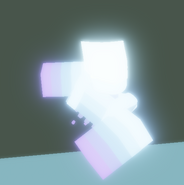
- STW received a new model at 8/12/2020 (MM/DD/YYYY). It looks very similar to STW's second model. They both have yellow, transparent bodies. It also received a black and white, flashing color scheme when using Stand Mode: ON moves instead of just a grey color like in the old versions of the game.
- This is the only version of The World without a “Muda” sound effect.
- STW is supposed to be The World before DIO has master it, ironically, it's an evolution of Vampiric The World which is supposed to be The World when DIO has already master it, combined with his Vampiric Abilities.
- This is the only The World variation (without counting shinies) that has lines from HFTF
Gallery
Stand Mode: OFF
Stand Mode: ON
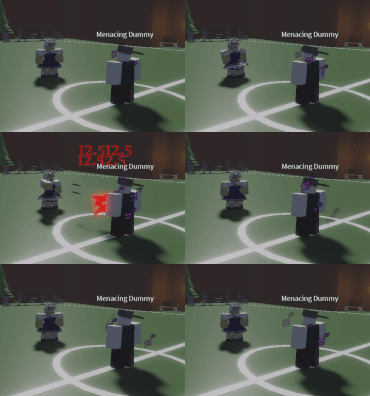
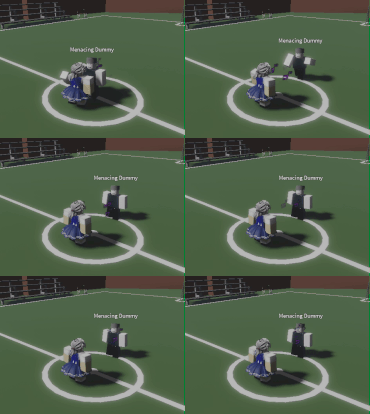
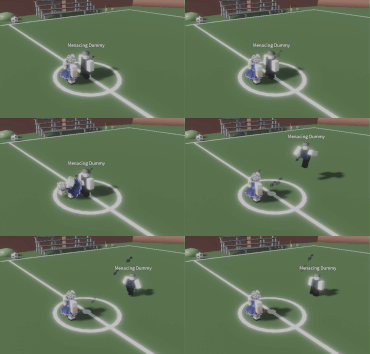
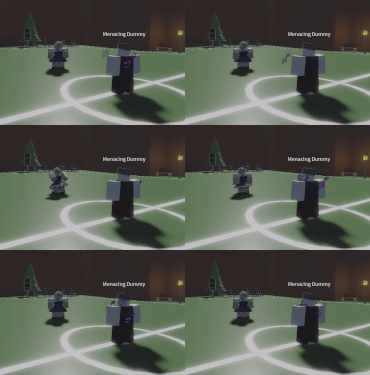
<gallery> STWpose.PNG|Shadow The World's Pose.
|Shadow The World's Pose.
Audio Gallery
Press "Expand" to see all of the audio clips for Shadow The World.
Quick Jab/Sudden Punch Knife Volley High Kick Draining Grab (Nazimuzo!) Space Ripper Stingy Eyes "Charisma!" 'URRYYAH!
Shadow Uppercut/Shadow Combo/Left Click The World's Unknown Ability (Global) The World's Unknown Ability (Local) "Are you really trying to shoot me?" ("Scales of Horror") Time Stop Teleport Block
User's Death
"..You are Watching me?!" "You are next."


